Understanding the 5-Minute Increment Method
The 5-minute increment method is a systematic approach to teaching children how to read time on an analog clock. This proven technique breaks down the complex skill of time-telling into manageable steps, building from basic hour recognition to precise minute reading. It's the method recommended by most elementary education curricula worldwide.
This comprehensive guide will show you exactly how to implement this method for maximum student success.
Why the 5-Minute Increment Method Works
This approach is effective because it:
- Builds on Skip Counting: Leverages students' existing ability to count by fives
- Provides Structure: Offers a clear, step-by-step progression
- Reduces Overwhelm: Breaks complex skill into smaller, achievable goals
- Creates Patterns: Helps students recognize predictable time patterns
- Supports Mastery: Each level builds confidence before advancing
- Aligns with Standards: Matches most educational curriculum requirements
Prerequisites: What Students Need First
Before beginning the 5-minute increment method, ensure students have mastered:
Essential Skills:
- Number Recognition: Can identify numbers 1-12 instantly
- Skip Counting by 5s: Can count 5, 10, 15, 20... up to 60
- Basic Addition: Can add simple numbers (especially by fives)
- Clock Familiarity: Knows the parts of a clock (face, hands, numbers)
- Hand Distinction: Can identify which hand is for hours and which for minutes
Quick Prerequisite Assessment:
Test readiness with these questions:
- "Can you count by fives to 60?" (5, 10, 15, 20...)
- "Which hand on the clock is longer?"
- "What number comes after 11 on a clock?"
- "If we start at 5 and count by fives, what comes next?" (10)
If students can answer these confidently, they're ready to begin!
The 5-Minute Increment Method: Step-by-Step
Phase 1: Master Whole Hours (Week 1-2)
Goal: Students can read times like 1:00, 2:00, 3:00
Teaching Steps:
- Introduce the Hour Hand: "The short hand tells us the hour"
- Explain O'Clock: "When the long hand points to 12, we say 'o'clock'"
- Practice Recognition: Show various whole hours and have students identify them
- Connect to Daily Life: "We eat lunch at 12 o'clock"
Activities:
- Use demonstration clock to show whole hours
- Have students set their own clocks to whole hours
- Create a daily schedule using only whole hours
- Practice with worksheets from our generator (Level 1: Whole Hours)
Mastery Check: Student can correctly read 10 different whole hour times in a row.
Phase 2: Introduce the Minute Hand (Week 3)
Goal: Students understand the minute hand and the 5-minute markers
Teaching Steps:
- Introduce Minute Hand: "The long hand tells us the minutes"
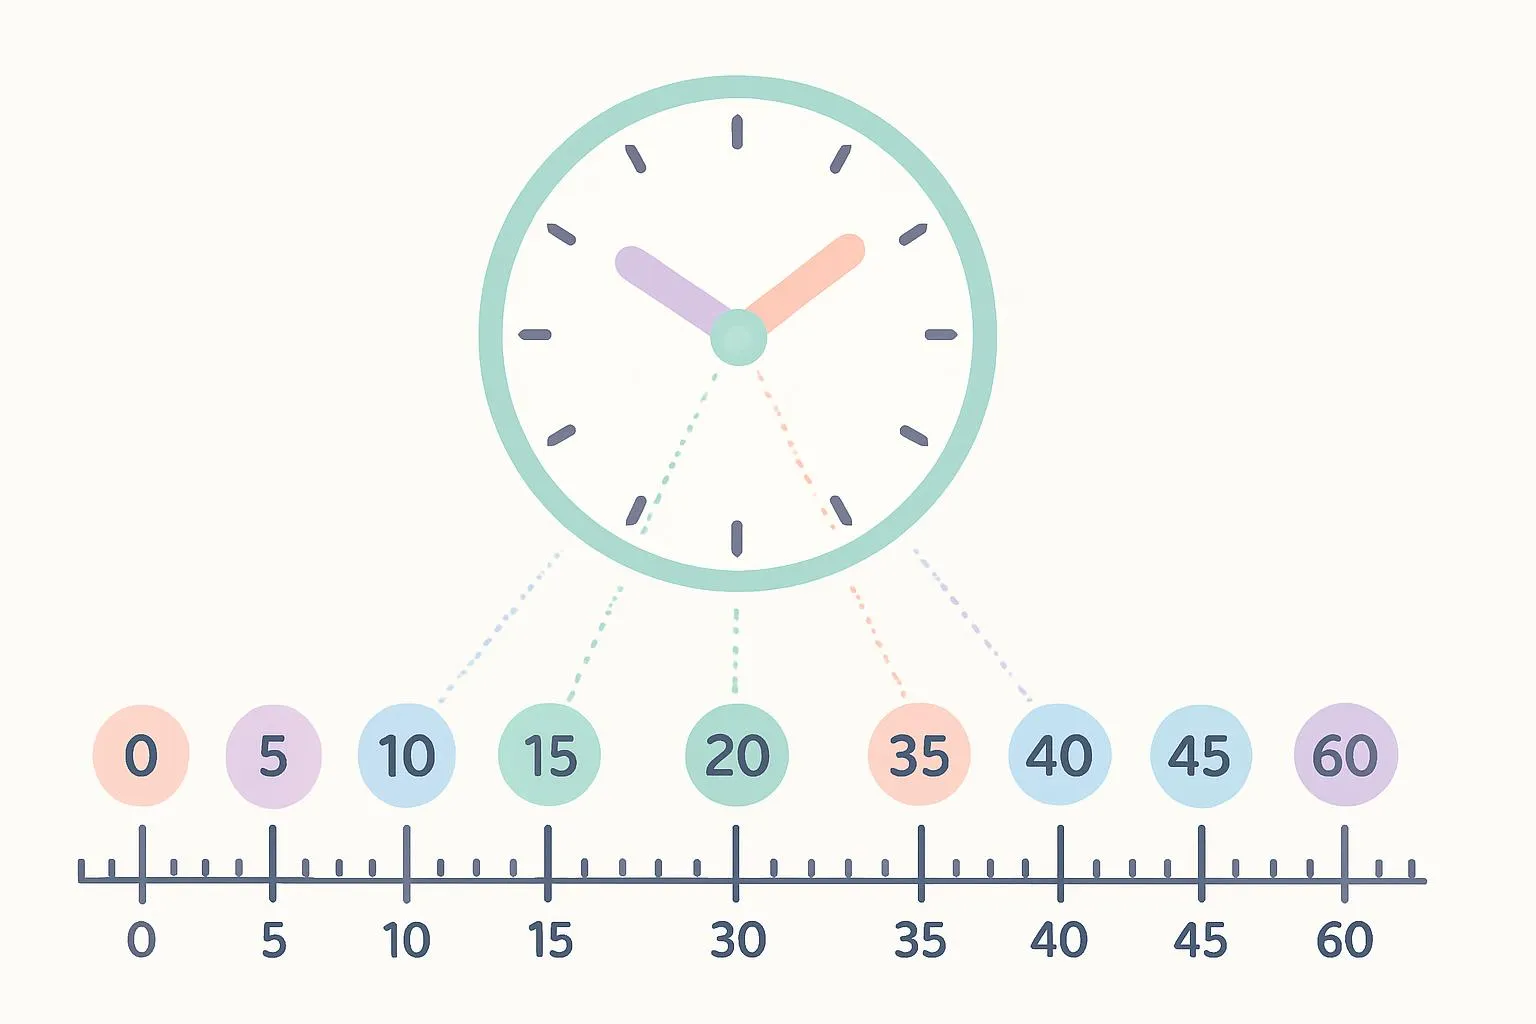
- Show the Pattern: "Each number represents 5 minutes"
- Label the Clock: Write 5, 10, 15, 20, 25, 30, 35, 40, 45, 50, 55, 60 around the clock
- Practice Counting: Point to each number and count by fives together
Key Concept: "When the minute hand points to the 1, it's really pointing to 5 minutes. When it points to the 2, it's 10 minutes!"
Activities:
- Create a labeled clock poster for the classroom
- Practice counting by fives while pointing to clock numbers
- Use color coding: hour numbers in blue, minute numbers in red
- Play "minute hand pointing" game
Phase 3: Half Hours (Week 4-5)
Goal: Students can read times like 1:30, 2:30, 3:30
Teaching Steps:
- Introduce 30 Minutes: "When the minute hand points to 6, it's 30 minutes or half past"
- Show Hour Hand Position: "Notice the hour hand is halfway between two numbers"
- Practice Reading: "The hour hand is between 3 and 4, the minute hand is on 6, so it's 3:30"
- Introduce Language: "We can say '3:30' or 'half past 3' or 'three thirty'"
Common Challenge: Students may say "4:30" when the hour hand is between 3 and 4.
Solution: "The hour hand hasn't reached 4 yet, so we're still in the 3 o'clock hour. It's 3:30."
Activities:
- Match analog half-hour times to digital equivalents
- Draw hour hands for given half-hour times
- Create a "half past" daily schedule
- Use worksheets combining whole hours and half hours
Mastery Check: Student can correctly identify 8 out of 10 half-hour times.
Phase 4: Quarter Hours (Week 6-7)
Goal: Students can read :15 and :45 times
Teaching Steps:
- Introduce Quarter Past (15 minutes): "When the minute hand points to 3, it's 15 minutes or quarter past"
- Introduce Quarter To (45 minutes): "When the minute hand points to 9, it's 45 minutes or quarter to the next hour"
- Explain Quarters: Use a circle divided into 4 parts to show quarters visually
- Practice Both: Show the difference between quarter past and quarter to
Visual Aid: Draw a clock divided into four colored quarters to show 15-minute segments.
Activities:
- Quarter hour matching games
- Draw hands for quarter past and quarter to times
- Real-world connections: "Class starts at quarter past 8"
- Mixed practice with whole hours, half hours, and quarter hours
Phase 5: All 5-Minute Intervals (Week 8-10)
Goal: Students can read any time in 5-minute increments
Teaching Steps:
- Review the Pattern: Reinforce that each number = 5 minutes
- Systematic Practice: Practice each 5-minute interval (5, 10, 15, 20, 25, etc.)
- Reading Strategy: "Find where the minute hand points, count by fives to that number"
- Hour Hand Awareness: "Always check which two numbers the hour hand is between"
Example Walkthrough:
"Let's read this clock together. First, where is the hour hand? It's between 2 and 3, so we're in the 2 o'clock hour. Now, where is the minute hand? It's pointing to the 7. Let's count by fives: 5, 10, 15, 20, 25, 30, 35. The time is 2:35!"
Activities:
- Timed challenges: "How fast can you read these 10 times?"
- Create your own clock times and have partners read them
- Real-world schedule with various 5-minute interval times
- Use our generator for progressive difficulty worksheets
Mastery Check: Student can correctly read 15 out of 20 random 5-minute interval times.
Phase 6: Precision Reading - Individual Minutes (Week 11-12)
Goal: Students can read any time to the exact minute
Teaching Steps:
- Introduce Minute Marks: "Between each number are 4 small lines, each representing 1 minute"
- Counting Strategy: "Count by fives to the nearest number, then count by ones"
- Example: "Minute hand is between 7 and 8, closer to 8. Count: 5, 10, 15, 20, 25, 30, 35, then 36, 37, 38. It's 38 minutes!"
- Practice Precision: Start with times just past 5-minute marks (like 3:16, 3:17)
Activities:
- Precision reading challenges
- Compare times: "Which is later, 3:23 or 3:28?"
- Draw hands for specific minute times
- Real-world precision: "The bus arrives at 7:43"
Teaching Tools and Resources
Essential Materials:
- Demonstration Clock: Large clock for whole-class instruction
- Student Clocks: Individual clocks with movable hands
- Labeled Clock Poster: Shows 5-minute increments clearly
- Worksheets: Progressive difficulty from our free generator
- Digital Timer: For timed practice activities
Helpful Visual Aids:
- Clock with removable minute hand (teach hour hand first)
- Color-coded clocks (different colors for different intervals)
- Number line showing 0-60 in fives
- Quarter circle diagrams showing 15-minute segments
Differentiation Strategies
For Struggling Learners:
- Extended Time: Spend 3-4 weeks on each phase instead of 1-2
- More Scaffolding: Keep minute numbers written on clock longer
- Simplified Practice: Focus on fewer time intervals (just :00, :15, :30, :45)
- Multisensory Approach: Use tactile clocks, movement activities
- One-on-One Support: Provide individual practice time
- Smaller Steps: Break each phase into even smaller sub-steps
For Advanced Learners:
- Accelerated Pace: Move through phases faster
- Skip Phases: May not need extensive whole hour practice
- Add Challenges: Introduce elapsed time calculations early
- Precision Focus: Move to exact minute reading sooner
- Real-World Problems: Complex word problems involving time
- Digital Conversion: Practice converting between analog and digital
Common Challenges and Solutions
Challenge 1: Confusing Hour and Minute Hands
Signs: Student reads 3:15 as "15:03" or similar errors
Solutions:
- Use dramatic size difference in demonstration clocks
- Color code: blue for hour, red for minute
- Create rhyme: "Short and slow shows the hour we know"
- Practice identifying hands before reading time
Challenge 2: Hour Hand Position Confusion
Signs: Reading 3:45 as "4:45" because hour hand is close to 4
Solutions:
- Emphasize: "The hour hand hasn't reached 4 yet"
- Use phrase: "We're still in the 3 o'clock hour"
- Show how hour hand moves gradually, not in jumps
- Practice with times like :45 and :50 specifically
Challenge 3: Difficulty with Skip Counting
Signs: Can't count by fives reliably to 60
Solutions:
- Pause time-telling instruction to practice skip counting
- Use songs and chants for counting by fives
- Create number line visual aid
- Practice daily until automatic
Challenge 4: Reading Past the Hour
Signs: Struggles with times like 12:50 or 11:55
Solutions:
- Extra practice with times near the hour
- Emphasize: "Look carefully at which two numbers the hour hand is between"
- Use contrasting examples: Show 12:50 and 1:50 side by side
Assessment Strategies
Formative Assessment (Ongoing):
- Quick Checks: Show a clock, ask "What time is it?"
- Exit Tickets: Read 3 times before leaving class
- Observation: Watch students during practice activities
- Self-Assessment: Students rate their own confidence
Phase Mastery Tests:
Before moving to next phase, students should demonstrate:
- 80% accuracy on current phase times
- Consistent correct responses (not just lucky guesses)
- Reasonable speed (not taking excessively long)
- Confidence in their answers
Summative Assessment:
End-of-unit assessment should include:
- Reading various times (whole hours through 5-minute intervals)
- Drawing hands for given times
- Matching analog to digital times
- Real-world word problems
- Sequencing times in order
Parent Communication and Home Support
Letter to Parents:
"We're learning to tell time using the 5-minute increment method. This week we're working on [current phase]. You can help at home by: 1) Pointing out clocks and asking 'What time is it?', 2) Using time language naturally ('We'll leave in 15 minutes'), 3) Practicing with the worksheets we send home. Thank you for supporting your child's learning!"
Home Practice Suggestions:
- Place an analog clock in child's room
- Practice reading the clock at regular intervals
- Connect times to daily routines
- Use our free generator to create practice worksheets
- Make it fun with time-based games and challenges
Progress Tracking
Student Progress Chart:
Create a visual chart showing:
- ☐ Phase 1: Whole Hours (Mastered: ___/___)
- ☐ Phase 2: Understanding Minute Hand
- ☐ Phase 3: Half Hours (Mastered: ___/___)
- ☐ Phase 4: Quarter Hours (Mastered: ___/___)
- ☐ Phase 5: 5-Minute Intervals (Mastered: ___/___)
- ☐ Phase 6: Exact Minutes (Mastered: ___/___)
Students can color in or check off each phase as they master it, providing visual motivation.
Conclusion: Building Time-Telling Mastery
The 5-minute increment method provides a structured, systematic approach to teaching one of elementary education's most important skills. By following these phases and allowing adequate time for mastery at each level, you'll build confident, capable time-tellers.
Key Takeaways:
- Follow the phases in order—don't skip ahead
- Ensure mastery before progressing to the next phase
- Use varied activities, not just worksheets
- Differentiate for diverse learners
- Connect time-telling to real-world contexts
- Celebrate progress at each phase
Your Implementation Checklist:
- ☐ Assess student prerequisite skills
- ☐ Gather necessary materials (clocks, posters, worksheets)
- ☐ Begin with Phase 1: Whole Hours
- ☐ Progress systematically through each phase
- ☐ Assess mastery before advancing
- ☐ Provide differentiated support as needed
- ☐ Communicate progress with parents
- ☐ Celebrate student success!
Recommended Reading
- 3rd Grade Telling Time: 5-Minute Interval Worksheets
- Teaching Quarter Past and Quarter To
- Elapsed Time Worksheets: Complete Practice Guide
- 📖 Complete Teaching Guide: How to Teach Children to Tell Time
Ready to implement the 5-minute increment method? Start by generating perfectly leveled worksheets for each phase using our free clock worksheet generator. Your students will be confident time-tellers in no time!